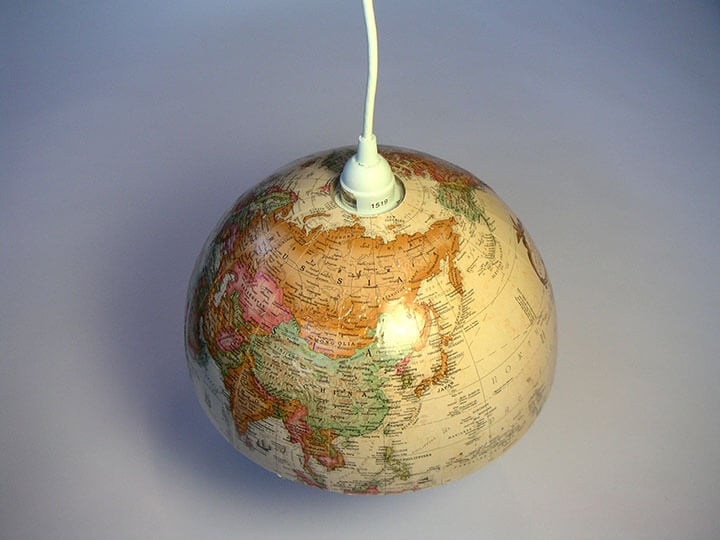
DIY – TURN THAT OLD GLOBE INTO A HANGING LAMP

Sometimes you need look no further for inspiration and materials for a rainy day project than your own home. Plus the internet. And let’s be honest about it. The best thing about the internet isn’t social media or shopping. It’s the do-it-yourself videos. (O.K., maybe the cat videos too.)
We spend a lot of time thinking about what you can do with globes and maps. So, we had a do-it-yourself idea. Maybe you have an old globe with a dent or a scratch that you didn’t want to throw away. It ended up in the basement or the attic to live out its days in peace and quiet. Sorry. Nap’s over. We’re going to help you breathe new life into that old globe by turning it into a hanging lamp. Here’s what we’re going to do:
- cut a globe in half
- cut a hole in the top
- decorate the inside
- attach a lamp fixture
You’ll need a few things you can find at any hardware or home improvement store. The simplest way to do it is to buy a “hanging lamp kit”. Choose a white one for a bright room with white walls or a black or brown one for darker rooms. Or, by sticking to our original premise of finding everything you need in your home, you can cannibalize an old lamp for its fixture, cable, and plug. Here’s what you’ll need:
- a dremel with a cutting bit, sharp knife or x-acto blade.
- medium grit sandpaper
- a drill and a hole saw attachment to make a hole at the Pole for the electrical cord and light fixture. Check your lamp kit for the correct size of hole.
- a length of plain electrical cable for lamps (white or brown)
- an electrical plug
- a simple fixture for a single light bulb with a switch or substitute with a retro/vintage looking fixture and bulb
- an old globe
- water colors, paint, and brush or any other crafty idea to decorate the inside of the globe like gluing torn pieces of colored tissue paper to the inside
- a can of urethane spray to finish the inside of the globe shade (optional)
Almost all globes are two separate hemispheres made from paper-fiber glued together. Some globes are made of plastic or metal, but to do this project you’ll want the standard paper-fiber. They’re easy to recognize because they have a thin cellophane tape running along the equator where the two halves meet.
To start, simply pull up the cellophane tape. You’re going to carefully separate the two halves of the globe with the dremel, x-acto blade or small, sharp knife. The two sides are glued together. There’s a thick cardboard ring, about 1.5″ high, that runs around the inside along the equator. The two halves of the globe are glued to it. This part may take a few minutes. Proceed slowly.
We suggest you cut along the equator first to make sure the two edges are no longer attached to each other. Both sides are still glued to the inner ring. Carefully pull the two sides apart. Brute strength may be required so don’t be afraid to pull hard.
Next, sand the edge to get a smooth finish.
Now it’s time to cut the hole for the light fixture at the North Pole. Place the hemisphere on a flat surface with the North Pole face the ceiling. Slowly drill the hole using the hole saw attachment.
Read the directions that came with your lamp kit or take a long hard look at one of your existing lamps. You’ll see how to insert it into the top of the globe and fasten it.
Now it’s time to decorate the inside of your globe shade. Lighter colors will reflect more light. You can tear up an old map or colored tissue paper or an old magazine and glue the pieces along the inside like a mosaic or a collage. Or you can paint pictures. It’s up to you.
Tip: Sit in a chair near where your new globe lamp will hang and imagine how much of the inside you’ll see when the lamp is on.
We have found that drilling small holes along the continent borders illuminates them and throws spots of light on the walls of your room, creating a very nice effect. Drill from the outside in.
Now you can enjoy your new lamp and your new sense of accomplishment with a good book about adventures of discovery and traveling the globe.


